The Blog

  • 01 Oct

    Skin dryness and irritation: skincare tips for swimmers

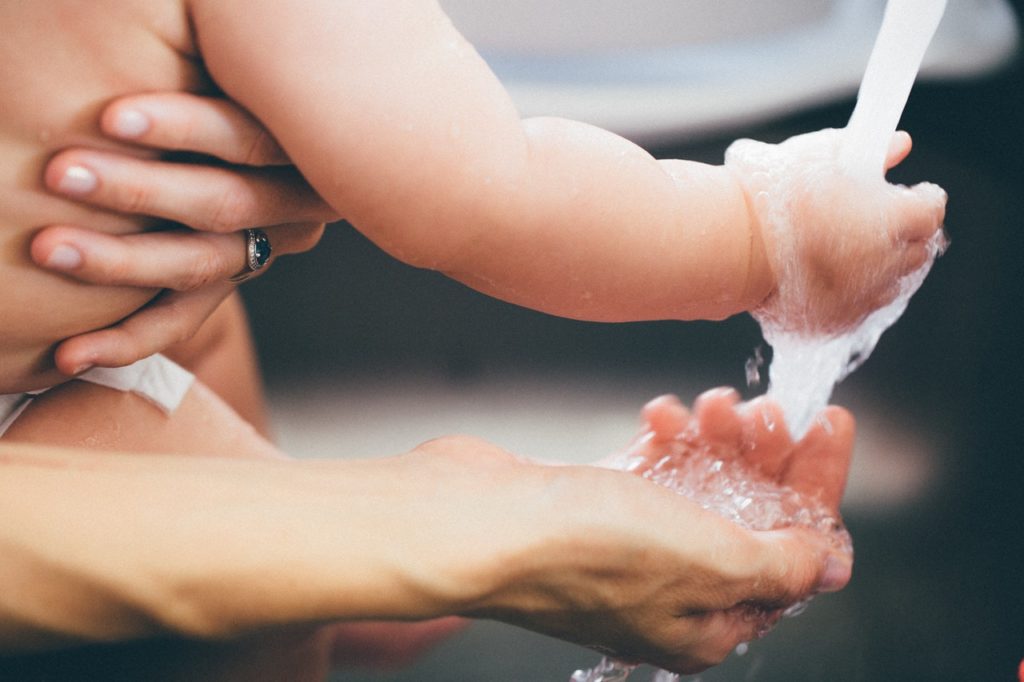
    Photo by andres chaparro from Pexels

    While we may be ready to welcome cooler temperatures, the shift from warm to cold weather can often heighten skin sensitivities. Because skin thrives on consistency, rapid changes in temperature and daily routines can take a toll on skin. With the shift from summer to fall, temperature and humidity drop more quickly, the skin has to work harder to maintain hydration.

    When the protective skin barrier is disrupted during a transitional period, it may be more susceptible to inflammation and irritation. This may manifest in the form of dryness, cracks, dehydration, and inflammation. 

    These symptoms can become more noticeable in a dry – wet – dry and chlorinated environment such as swim lessons. Chlorine is required by law in all commercial swimming pools including saline-based pools. Chlorine is used as a disinfectant to kill harmful bacteria and prevent illness – similar to how we use soap to protect and clean our skin! Our public drinking and bathing water supply is also treated with chlorine to help protect us. 

    Below are some skincare tips we want to share with our Old City Swim families that our coaches have found helpful. Anything to help minimize skin irritation, during seasonal transitions, as well as throughout the year!

    Swim skincare tips:

    • After lessons, take a quick pass through the shower on deck! Rinsing off right away with plain, warm water is best. This helps open up the pores, allowing any residual chlorine to wash away. 
    • Avoid soap. Chlorine itself is a disinfectant…so no need to add more chemicals on top of chemicals. No need to scrub or exfoliate either as that may further aggravate already clean skin.  
    • After showering, generously apply a mild, unscented lotion and put on comfy loose fitting natural fiber clothing.
    • Finish off your post-swim lesson routine with another round of lotion before bed. No need to rinse off or soap up again! 
    • While not required, rinsing off before getting in the pool can be helpful if skin is particularly sensitive or prone to irritation. This allows your hair and  skin to absorb regular water before it takes in chlorinated water. Again, the shower on deck at lessons is perfect for this!
  • 05 Feb

    Revisiting the Sweet Spot

    Why is the Sweet Spot SOOOOO important and why do we keep talking about it to the point where it warrants back-to-back blog posts?!?! Because the Sweet Spot is the key that unlocks swimming efficiency.

    Swimming efficiency is a competitive advantage for athletes and a survival strategy for the rest of us. Efficiency in the water starts with balance. It’s not about having the strongest kick or biggest pull. Balance is floating but it’s more than just staying on the surface. Being on the surface is the default position.

    Balance is first taught in Level 2 with front and back floats. These are the easiest balance positions to learn because they provide the most surface area to work with. Front and back floats are like riding a bicycle. The Sweet Spot side float is like learning to ride a unicycle. It’s about countering the unbalanced part of the body. This makes the sweet spot a difficult yet critical position to master when learning how to swim.

    The Sweet Spot is the single most important position in freestyle and backstroke. These strokes, when performed well, are really all about swimming side to side. The finish of each of these strokes is in the sweet spot or side balance position. A proper sweet spot is a swimmer’s rest position in freestyle and backstroke.

    In the Sweet Spot position, a person is stretched out as long as possible on their side with their head turned just enough towards the sky so they can breathe while their feet engage in a very small flutter kick. In the Learn-to-Swim Program, swimmers learn how to perform the Sweet Spot on both sides of the body. Most people have one side that feels more natural which is completely normal. Students learn Sweet Spot on both sides because our swimmers learn how to breathe bi-laterally in Level 5!

    What the Sweet Spot Looks Like:

    • Head is in line with the spine in a neutral position, chin up slightly
    • Eyes are looking up towards the ceiling; tip of the nose facing the ceiling
    • Top hip is up at/near the surface of the water
    • Arm closest to bottom of the pool is extended in streamline in line with the head and NOT moving
    • Arm closest to ceiling is extended down the side and NOT moving, resting on the thigh
    • The top facing shoulder is dry out of water or at the water surface

    Common Sweet Spot Mistakes to Correct:

    • Under or over-rotation – either rolling too far onto stomach or back reverting to the front or back float
    • If the chin is tucked too much swimmer’s body will look like a curved “C”

    How a parent can coach and be supportive outside lessons:

    • Remind your child it’s okay to feel uncomfortable and awkward when practicing the Sweet Spot – it’s an entirely new position for the body. The body is smart and will learn to feel comfortable the more time they can spend in the Sweet Spot!
    • When your child is swimming outside of lessons, encourage them to roll onto their side to take a breath instead of standing up or flipping all the way onto their back. Any free swim time where your child cannot easily touch the bottom is awesome learning time!

    Overall, Sweet Spot competency builds endurance and improves one’s ability to swim longer distances. Although the Sweet Spot is a skill first learned in Level 4, it continues to be practiced and further developed and honed throughout the rest of the Learn-to-Swim program levels.

    By Amy Rzepka Uncategorized
  • 21 Sep

    Learning to roll side-to-side in the “sweet spot”

    Watch our Sweet Spot Video!

    One skill we teach at Old City Swim School when preparing swimmers to learn freestyle is the sweet spot. The sweet spot builds on the streamline flutter kick position learned in Level 3. The sweet spot drill allows a swimmer to focus on rolling their body side-to-side while moving across the water. This rotational movement is foundational for eventually learning freestyle with rotational breathing. 

    Watch our sweet spot video by clicking on the image above with your child at home! Point out how the body is positioned:

    • The upward facing arm on top of the water is placed against the side of the leg.
    • The downward facing arm is in the water extended out overhead in a streamline position.
    • The swimmer uses a traditional flutter kick.
    • Ignore the head position in the video as your student will be taught to look up towards the ceiling and not asked to have their face in the water when learning the sweet spot.


    By Amy Rzepka Learn-to-Swim
  • 03 Aug

    How to prepare your child for swim lesson success

    In order to be successful in Old City’s Learn-to-Swim program, your child must be comfortable independently getting in the pool with their designated coach without a parent present and demonstrate a willingness to try new things and learn from their coach.

    Our goal is to teach your child how to swim and ensure they have fun along the way! In order to achieve this, your child is going to be asked to get wet, splash around, and try new things. Our instructors are highly trained but they are not miracle workers. We believe that no child can learn how to swim if they are afraid or scared in the water.

    Swim Lesson Readiness Checklist: Is my child able to do the following?

      • Willingly put their head underwater in a bathtub or pool?
      • Be away from parent(s) for a 30-minute lesson?
      • Meet a new coach and have that person work with and hold them in the water
      • Meet and Interact with peers in their lesson group
      • Listen and watch the teacher demonstrate basic lesson skills and drills
      • Understand and try their best to follow directions
      • Comply with our #1 rule of always holding on to the wall with two hands unless their coach instructs them otherwise


    At-Home Readiness Practice:

      • Have your child lay on his back in the bathtub filled with enough water to come up to the ears. Ask them to use their hands to scoop water across their body. Ask them to roll their head side-to-side they are comfortable having water in their ears.
      • Sitting-up in the tub, have your child scoop water into their hands and “wash their face” by splashing their face with water with their eyes closed.
      • Have your child learn to put their face into the water and then sit back up. Learn to be okay with just blinking the water away and not needing to wipe eyes or wipe face excessively with the hands. Just letting the water “drip” off the face.
      • Get your child comfortable with water being scooped and poured over their head, letting it trickle down their face.
      • Encourage your child to have fun and play by splashing their own hands/arms/legs/feet and getting splashed in the face with water.


    Get Your Child Comfortable Doing the Following at a Pool:

      • Independently holding on to the wall or edge of the pool in a place where your child is not able to touch the bottom
      • Holding on to the wall or edge and putting ears, back of the head, face, or submerging (with mouth closed) to the chin, and then the nose.
      • Going under while being supported under the armpits by a trusted adult and then brought back up to the surface
      • Jumping in and submerging underwater with assistance (or not) from a trusted adult coming back up to the surface
      • Going underwater alone while holding on to the wall or edge of the pool. At OCSS we call this doing a “bob” – learn more about what a Level 1 “bob” is here


    Not sure if your child is ready for independent learn-to-swim lessons? To learn more about how you can prepare your child for success in swim lessons, check out our FREE download on How to Set up your Child for Success in Swim Lessons!

    By Amy Rzepka Learn-to-Swim
  • 16 Jul
    Is it okay for my child to wear puddle jumpers or water wings in the pool?

    Is it okay for my child to wear puddle jumpers or water wings in the pool?

    We are often asked by parents if it’s okay for their children to wear puddle jumpers, water wings, or flotation devices at the pool. At Old City Swim School, water safety is something we take very seriously – and emphasize with students at every lesson. We want to make sure you are also equipped with all the information you need to make a decision on what is best for your child.

    We believe allowing children ample swim time without a floatation device is the absolute best way to develop water independence. (The exception here is if your child has special needs – if that is the case, let’s chat about the best solution.)

    When children who are not water independent are provided puddle jumpers, water wings, or flotation around the waist, they aren’t experiencing what really would happen if they went into the water on their own. These devices teach children to be comfortable in the water in a vertical position, which also happens to be the exact best position to sink to the bottom.

    This gives children a false sense of security that they know how to maneuver through a pool on their own. Both of these outcomes are simply unsafe and even potentially dangerous. Even a life jacket positions a person vertically in the water. This is great for when a lifesaving device is actually needed, not for learning how to swim at the pool. Bottom line is that any of these devices hinder proper swim movements and can easily create water independence issues that hamper learning how to swim properly.

    So what is a parent supposed to do?! It’s easy as a parent to stick a kid in water wings so you can also relax a bit at the pool yourself. Plus many kids love to wear these items, as they feel independent and are brought back up to the surface when they jump in the water. How can this not be a win-win?! If you want your child to really learn water independence, get rid of their water wings or devices today. It may not be the short-term solution you were hoping for as a parent, however, it is the best way to get you where you want to be long-term. (i.e. relaxing on a lounge chair reading a book next to the pool while your water independent child swims.) 

    Providing your child with a consistent flotation-device free water experience is the best way to support the development of a water independent child. This allows them to gain confidence getting totally wet and immersed over their head and practice how to roll over and float on their backs (the safest and least tiring position if they ever have to wait for help).

    Without props like floaties or water wings, your child will be allowed to experience how their body actually responds to water. If they jump off of a step, they will experience being submerged underwater. As a parent, you can reinforce the movements they need to learn to bring themselves to the surface and promote the use of the swim skills they are being taught at their current skill level.

    If you’ve used floaties or water wings with your child in the past, don’t worry. You can start fresh today helping your little one to learn the real cause and effect of their body’s movements in the water. To help encourage your child, get a pair of goggles to help build underwater confidence, and start using a swim noodle to aid with front and back floating. Reserve the use of approved flotation devices for when appropriate.

    The best thing you can do to keep your child safe in and around water is to enable them to learn water independence without flotation aids and consistently have them in swim lessons over time. While this investment requires constant adult supervision and a commitment to participating in lessons, it will pay off in the long-run!

    For more tips on how you can teach your child to become more comfortable and water independent right at home check out our FREE download on How to Set up your Child for Success in Swim Lessons!

    By Amy Rzepka Learn-to-Swim
  • 03 May
    “Water Independence” and why it’s critical for swim lesson success

    “Water Independence” and why it’s critical for swim lesson success

    Water independence is a foundational swim skill and one that is woven into Old City Swim School’s program across all levels. Water independence can be learned by anyone of any age or ability.

    Water independence is foremost a safety issue. When a swimmer feels confident and comfortable being independent of another person/object in the water, they are more likely to survive an incident that may occur when that person/object becomes disabled, momentarily distracted, or perhaps involved in an incident themselves. Water independent people do not see water as inherently dangerous. They are comfortable with the presence of water completely surrounding them and understand proper underwater breathing techniques (exhaling from the nose) as safe and necessary.

    Water independence also informs better technique. Swimming is a highly individualized sport. Each swimmer must rely on his own natural state of buoyancy and body and self-mobility to float, move, and ultimately achieve speed, efficiency, and endurance for either sport, play, or survival needs. Water independence encourages an individual to figure out how he can best use his own body to swim without pain, getting tired, or elevating a stress/panic response.

    Within Old City’s SwimAmerica-based curriculum, an individual’s water independence shows up in a number of ways across all levels. In Levels 1 and 2, poor water independence may look like an extreme dislike of getting the face, mouth, or eyes wet; or a fear of “floating” in the water such as clinging/clutching to a parent or coach. In Levels 3 and 4, it may be that a swimmer can effectively kick, but they are only strenuously kicking to achieve the goal of reaching the coaches arms as fast as they can.

    In the upper levels, a lack of water independence may show up as a swimmer becoming easily exhausted and a preference for floundering, dog paddling, or treading sloppily instead of using learned techniques to reach the end of the lane.

    To help your child continue to build water independence outside of swim lessons, allow water “play” time that encourages building familiarity with water being present all around the face/body. This can be as simple as a splashy bathtub experience, playing with a garden hose or sprinkler, or running through a local water splash park.

    For a swimmer who is clingy or clutches onto another person or object, encourage more time off the wall in open water. Establish rules such as “I will hold you and keep you safe, in return you can’t hold onto me” or “You can use my arm to hang on to, but not anything more and I will keep you safe” or “Put your arms around the swim noodle and I will stand close by to keep you safe.”

    For swimmers who have advanced to Levels 3 and 4, minimize “hold” time where swimmers are dependent on a parent while in deep water. Send your swimmer by helping launch them in a glide back to the wall immediately, or have them recover into a float position instead of grabbing you. Have them hold only your hand or arm instead of you holding their whole body. Encourage maintaining a streamline or floating position as a way to keep the body from going vertical in the pool, which often leads to the doggy paddle.

    For students in upper levels, discourage bad habits such as stopping and walking where they can stand or holding the lane line. Practice pushing off the wall in a streamline position instead of walking a few steps, or hopping before starting to swim. Practice strong finishes all the way to the wall instead of coming up and walking.

  • 26 Apr
    Get Geared Up! Old City Pop-up Suit Shop Coming May 5

    Get Geared Up! Old City Pop-up Suit Shop Coming May 5

    Calling all Old City Swim School families!

    Saturday, May 5 from 9:30am – 12:00pm local area outfitter Sport Fair is holding a pop-up suit shop for Old City Swim School families at the MSSD pool.

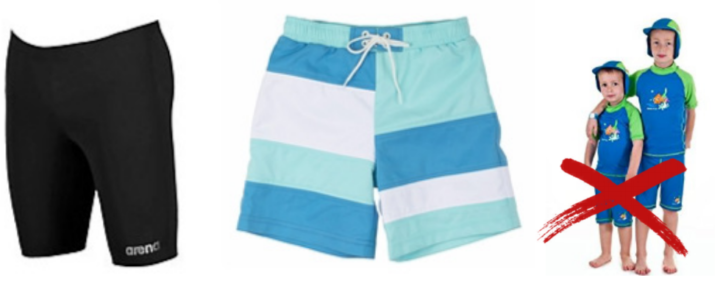
    Options include a traditional one-piece suit for girls and the popular mid-thigh jammer style for boys. Both styles will be customized with the Old City eagle!

    Girls one-piece and Boys Jammer suit styles

    Girls One-Piece: $45.85
    Boys Jammer: $41.61

    Prices include tax. Credit card only.

    All families are welcome to visit Old City’s suit shop Saturday, May 5! Access to the MSSD locker rooms will be available to provide families with an opportunity to try-on for sizing.

    Can’t make it May 5? No worries! Stay tuned for the next shopping opportunity and details regarding t-shirts and swim caps as well!

  • 05 Mar

    Deep-dive into the Infamous Level 1 “Bob”

    What exactly is a “slow and controlled bob?” Developing and maintaining a correct breathing pattern is the first fundamental in teaching your child how to properly swim. In Level 1 we focus exclusively on teaching your child how to breathe underwater. In order to pass Level 1, your child must be able to easily perform 10 slow and controlled bobs.

    A perfectly executed bob is when your child, who is holding on to the edge of the pool with two hands, takes a BIG breath in through their mouth and then submerges their head fully underwater while releasing air out their nose. The air exhaled through the nose becomes bubbles once your child is submerged underwater.

    At home, you can encourage your child to practice their “bob” in the bathtub. Our coaches frequently describe the exhale through the nose as “humming” underwater. The act of humming produces exhalation through the nose instead of the mouth.

    What we look for is that your child is able to consistently and repeatedly put his head underwater while exhaling properly through the nose, come up and take a new breath in and then do another bob exhaling through the nose again and getting the head completely submerged underwater.

    Additionally, we want to see that your child is confident and comfortable performing ten bobs in a row without stopping, getting distracted, or needing to adjust goggles or wipe water from their eyes/nose/mouth and without jumping up from the bottom of the pool.

    Proper exhalation relieves tension in the body and is a foundational step in developing water confidence and comfort. This becomes especially important in Level 2 when your child is learning how to float on their front and back.

    If your child has already mastered the “bob” check out our blog post here for important reminders on breathing for swimmers across all levels of our learn-to-swim program.

    To learn more about the fundamentals of teaching your child to learn how to swim, check out our free FREE download on How to Set up your Child for Success in Swim Lessons!

    By Amy Rzepka Uncategorized
  • 05 Mar

    Don’t Forget to Breathe!

    Proper exhalation while swimming is a vital skill for two reasons: 1) it’s how we teach your child to keep water out of their nose while they are on their back whether it be floating in Level 2, flutter kicking in Level 3, or learning backstroke, and 2) it’s how swimmers release air in preparation to take a breath.

    Ultimately swimming is all about breathing. In Level 1 we focus exclusively on teaching your child how to breathe underwater. Developing and maintaining a correct pattern of inhaling and exhaling is the first fundamental in teaching your child how to properly swim. If your swimmer is in Level 1 or is still “bob-reluctant,” check out our deep-dive on bobs blog post here.

    This blog post is for you if your child has ever gotten frustrated or exclaimed, “I can’t…”

    … go as far as the coaches are asking
    … hold my breath that long
    … float – I just sink!
    … do a somersault in the water
    … touch the bottom of the pool (at 3-4 feet of depth)

    The average healthy child should have no problem covering a distance of 20 feet in the water provided they are exhaling properly and performing the skills being taught correctly. Swimmers that are not exhaling properly are likely to feel winded or become out of breath more quickly. Exhaling, on land or in water, releases tension. When you hold your breath, your body is unable to release carbon dioxide (CO2). This causes a sense of urgency or “needing” to breathe and results in a swimmer lifting their head and losing their body position.

    Holding the breath and retaining tension makes it hard to feel comfortable and confident in the water. This feeling of needing to breathe creates a sense of fear and no one, regardless of age or ability, is able to learn when fear is present. By first teaching every single student how to breathe underwater, we are able to help a child establish a baseline comfort and confidence in the water that allows them to then be able to learn.

    For more advanced swimmers who are expected to bilaterally breathe during freestyle, stockpiling CO2 from not exhaling makes the time between three strokes feel very long regardless of how strong or powerful you are. A swimmer, in this case, is more likely to revert back to breathing solely on their favored side. This results in your stroke becoming lopsided from poor body rotation on your non-breathing side which then leads to arm pull deficiency and other problems such as the arm crossing the body’s centerline. All stemming from a poor breathing technique!

    Whether your child is in Level 2 or Level 10, you can encourage them to make sure they are remembering to exhale (in the form of bubbles) through their nose while their face is in the water. Ask them to demonstrate at Family Swim Night or in the bathtub at home. Double check that bubbles are emerging from their nose. Heck, have them role play and demonstrate their breathing and head rotation anywhere!

    If your child is struggling to exhale through the nose, suggest they close their mouth and hum (exhale in the form of bubbles) as they put their face into the water. As your child improves their ability to exhale without needing to think about it, they will be able to exhale easily through the nose with their mouth open. However, this can be difficult to achieve when first learning how to exhale through the nose.

    For more tips on how to set your child up for success learning how to swim check out our other blog posts here!

    By Amy Rzepka Uncategorized
  • 17 Jan

    Why we sing the same exact songs every single week in our Parent & Tot class

    In our Parent & Tot learn-to-swim program for kids under the age of three, we follow almost the exact same routine in every class, every single week. This might seem super boring to an adult, but it’s a deliberate effort on our part to help our youngest swimmers quickly adapt and adjust to our program.

    Predictability and routine help young children establish trust and feel safe. The more quickly we can establish this with our littlest customers and get them to a place where they are ready to learn, the sooner parents will reap the return-on-investment from lessons.

    Parents can help ensure a successful transition into the program by reinforcing aspects of the lesson, such as practicing the group sing-a-long songs at home in the bathtub during the week! 

    To help you get started today, below are the three primary songs we sing in our Parent & Tot class!

    Tiny Tim the Turtle
    I had a little Turtle,
    His name was Tiny Tim.
    I put him in the bathtub,
    To see if he could swim.
    He drank up all the water
    And ate a bar of soap.
    And now he’s in his bed,
    With bubbles in his throat!
    (Everyone blows bubbles)
    ***Repeat***

    What to do if water… 
    What do you do if you get water in the mouth? (parent coughs)
    What do you do if you get water in the nose? (parent hums)
    What do you do if you get water in the eye (parent says blink blink blink)  
    What do you do if you get water in your ear? (parent shakes their head side to side)
    ***Repeat***

    Reach and Splash
    (With child sitting on parent’s lap facing outward,
    parent moves child’s arms in a freestyle stroke pattern
    singing the words below and ending with arms extended overhead.)
    Reach and splash, reach and splash, and make a little splash splash
    Reach and splash, reach and splash, and make a little splash splash
    ***Repeat***

    By Amy Rzepka Uncategorized
1 2