Uncategorized

  • 01 Oct

    Skin dryness and irritation: skincare tips for swimmers

    Photo by andres chaparro from Pexels

    While we may be ready to welcome cooler temperatures, the shift from warm to cold weather can often heighten skin sensitivities. Because skin thrives on consistency, rapid changes in temperature and daily routines can take a toll on skin. With the shift from summer to fall, temperature and humidity drop more quickly, the skin has to work harder to maintain hydration.

    When the protective skin barrier is disrupted during a transitional period, it may be more susceptible to inflammation and irritation. This may manifest in the form of dryness, cracks, dehydration, and inflammation. 

    These symptoms can become more noticeable in a dry – wet – dry and chlorinated environment such as swim lessons. Chlorine is required by law in all commercial swimming pools including saline-based pools. Chlorine is used as a disinfectant to kill harmful bacteria and prevent illness – similar to how we use soap to protect and clean our skin! Our public drinking and bathing water supply is also treated with chlorine to help protect us. 

    Below are some skincare tips we want to share with our Old City Swim families that our coaches have found helpful. Anything to help minimize skin irritation, during seasonal transitions, as well as throughout the year!

    Swim skincare tips:

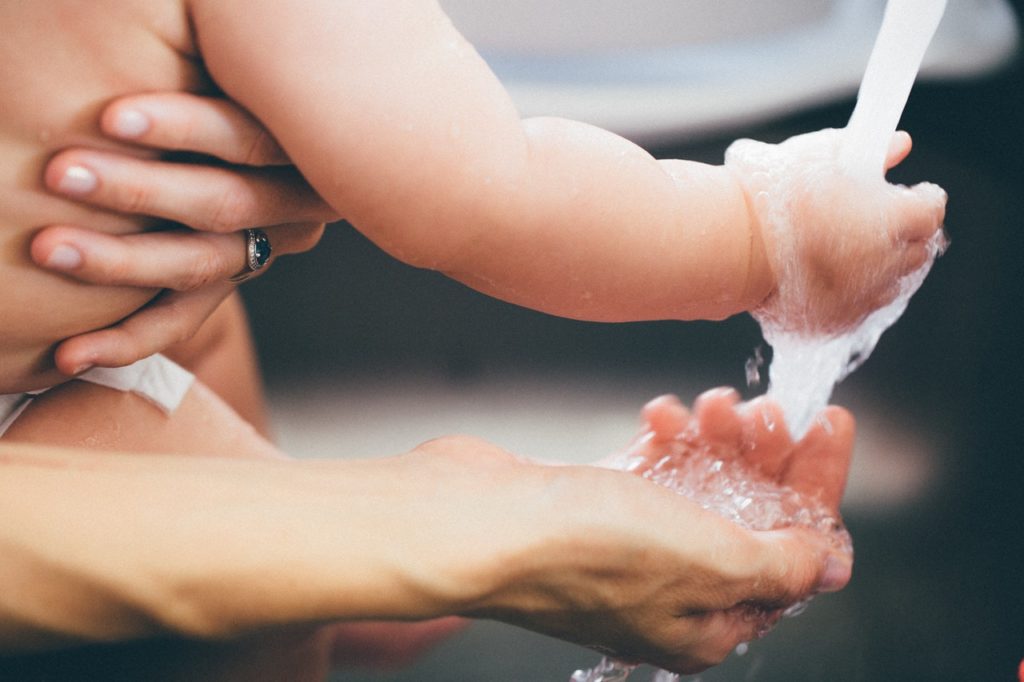
    • After lessons, take a quick pass through the shower on deck! Rinsing off right away with plain, warm water is best. This helps open up the pores, allowing any residual chlorine to wash away. 
    • Avoid soap. Chlorine itself is a disinfectant…so no need to add more chemicals on top of chemicals. No need to scrub or exfoliate either as that may further aggravate already clean skin.  
    • After showering, generously apply a mild, unscented lotion and put on comfy loose fitting natural fiber clothing.
    • Finish off your post-swim lesson routine with another round of lotion before bed. No need to rinse off or soap up again! 
    • While not required, rinsing off before getting in the pool can be helpful if skin is particularly sensitive or prone to irritation. This allows your hair and  skin to absorb regular water before it takes in chlorinated water. Again, the shower on deck at lessons is perfect for this!
  • 05 Feb

    Revisiting the Sweet Spot

    Why is the Sweet Spot SOOOOO important and why do we keep talking about it to the point where it warrants back-to-back blog posts?!?! Because the Sweet Spot is the key that unlocks swimming efficiency.

    Swimming efficiency is a competitive advantage for athletes and a survival strategy for the rest of us. Efficiency in the water starts with balance. It’s not about having the strongest kick or biggest pull. Balance is floating but it’s more than just staying on the surface. Being on the surface is the default position.

    Balance is first taught in Level 2 with front and back floats. These are the easiest balance positions to learn because they provide the most surface area to work with. Front and back floats are like riding a bicycle. The Sweet Spot side float is like learning to ride a unicycle. It’s about countering the unbalanced part of the body. This makes the sweet spot a difficult yet critical position to master when learning how to swim.

    The Sweet Spot is the single most important position in freestyle and backstroke. These strokes, when performed well, are really all about swimming side to side. The finish of each of these strokes is in the sweet spot or side balance position. A proper sweet spot is a swimmer’s rest position in freestyle and backstroke.

    In the Sweet Spot position, a person is stretched out as long as possible on their side with their head turned just enough towards the sky so they can breathe while their feet engage in a very small flutter kick. In the Learn-to-Swim Program, swimmers learn how to perform the Sweet Spot on both sides of the body. Most people have one side that feels more natural which is completely normal. Students learn Sweet Spot on both sides because our swimmers learn how to breathe bi-laterally in Level 5!

    What the Sweet Spot Looks Like:

    • Head is in line with the spine in a neutral position, chin up slightly
    • Eyes are looking up towards the ceiling; tip of the nose facing the ceiling
    • Top hip is up at/near the surface of the water
    • Arm closest to bottom of the pool is extended in streamline in line with the head and NOT moving
    • Arm closest to ceiling is extended down the side and NOT moving, resting on the thigh
    • The top facing shoulder is dry out of water or at the water surface

    Common Sweet Spot Mistakes to Correct:

    • Under or over-rotation – either rolling too far onto stomach or back reverting to the front or back float
    • If the chin is tucked too much swimmer’s body will look like a curved “C”

    How a parent can coach and be supportive outside lessons:

    • Remind your child it’s okay to feel uncomfortable and awkward when practicing the Sweet Spot – it’s an entirely new position for the body. The body is smart and will learn to feel comfortable the more time they can spend in the Sweet Spot!
    • When your child is swimming outside of lessons, encourage them to roll onto their side to take a breath instead of standing up or flipping all the way onto their back. Any free swim time where your child cannot easily touch the bottom is awesome learning time!

    Overall, Sweet Spot competency builds endurance and improves one’s ability to swim longer distances. Although the Sweet Spot is a skill first learned in Level 4, it continues to be practiced and further developed and honed throughout the rest of the Learn-to-Swim program levels.

    By Amy Rzepka Uncategorized
  • 05 Mar

    Deep-dive into the Infamous Level 1 “Bob”

    What exactly is a “slow and controlled bob?” Developing and maintaining a correct breathing pattern is the first fundamental in teaching your child how to properly swim. In Level 1 we focus exclusively on teaching your child how to breathe underwater. In order to pass Level 1, your child must be able to easily perform 10 slow and controlled bobs.

    A perfectly executed bob is when your child, who is holding on to the edge of the pool with two hands, takes a BIG breath in through their mouth and then submerges their head fully underwater while releasing air out their nose. The air exhaled through the nose becomes bubbles once your child is submerged underwater.

    At home, you can encourage your child to practice their “bob” in the bathtub. Our coaches frequently describe the exhale through the nose as “humming” underwater. The act of humming produces exhalation through the nose instead of the mouth.

    What we look for is that your child is able to consistently and repeatedly put his head underwater while exhaling properly through the nose, come up and take a new breath in and then do another bob exhaling through the nose again and getting the head completely submerged underwater.

    Additionally, we want to see that your child is confident and comfortable performing ten bobs in a row without stopping, getting distracted, or needing to adjust goggles or wipe water from their eyes/nose/mouth and without jumping up from the bottom of the pool.

    Proper exhalation relieves tension in the body and is a foundational step in developing water confidence and comfort. This becomes especially important in Level 2 when your child is learning how to float on their front and back.

    If your child has already mastered the “bob” check out our blog post here for important reminders on breathing for swimmers across all levels of our learn-to-swim program.

    To learn more about the fundamentals of teaching your child to learn how to swim, check out our free FREE download on How to Set up your Child for Success in Swim Lessons!

    By Amy Rzepka Uncategorized
  • 05 Mar

    Don’t Forget to Breathe!

    Proper exhalation while swimming is a vital skill for two reasons: 1) it’s how we teach your child to keep water out of their nose while they are on their back whether it be floating in Level 2, flutter kicking in Level 3, or learning backstroke, and 2) it’s how swimmers release air in preparation to take a breath.

    Ultimately swimming is all about breathing. In Level 1 we focus exclusively on teaching your child how to breathe underwater. Developing and maintaining a correct pattern of inhaling and exhaling is the first fundamental in teaching your child how to properly swim. If your swimmer is in Level 1 or is still “bob-reluctant,” check out our deep-dive on bobs blog post here.

    This blog post is for you if your child has ever gotten frustrated or exclaimed, “I can’t…”

    … go as far as the coaches are asking
    … hold my breath that long
    … float – I just sink!
    … do a somersault in the water
    … touch the bottom of the pool (at 3-4 feet of depth)

    The average healthy child should have no problem covering a distance of 20 feet in the water provided they are exhaling properly and performing the skills being taught correctly. Swimmers that are not exhaling properly are likely to feel winded or become out of breath more quickly. Exhaling, on land or in water, releases tension. When you hold your breath, your body is unable to release carbon dioxide (CO2). This causes a sense of urgency or “needing” to breathe and results in a swimmer lifting their head and losing their body position.

    Holding the breath and retaining tension makes it hard to feel comfortable and confident in the water. This feeling of needing to breathe creates a sense of fear and no one, regardless of age or ability, is able to learn when fear is present. By first teaching every single student how to breathe underwater, we are able to help a child establish a baseline comfort and confidence in the water that allows them to then be able to learn.

    For more advanced swimmers who are expected to bilaterally breathe during freestyle, stockpiling CO2 from not exhaling makes the time between three strokes feel very long regardless of how strong or powerful you are. A swimmer, in this case, is more likely to revert back to breathing solely on their favored side. This results in your stroke becoming lopsided from poor body rotation on your non-breathing side which then leads to arm pull deficiency and other problems such as the arm crossing the body’s centerline. All stemming from a poor breathing technique!

    Whether your child is in Level 2 or Level 10, you can encourage them to make sure they are remembering to exhale (in the form of bubbles) through their nose while their face is in the water. Ask them to demonstrate at Family Swim Night or in the bathtub at home. Double check that bubbles are emerging from their nose. Heck, have them role play and demonstrate their breathing and head rotation anywhere!

    If your child is struggling to exhale through the nose, suggest they close their mouth and hum (exhale in the form of bubbles) as they put their face into the water. As your child improves their ability to exhale without needing to think about it, they will be able to exhale easily through the nose with their mouth open. However, this can be difficult to achieve when first learning how to exhale through the nose.

    For more tips on how to set your child up for success learning how to swim check out our other blog posts here!

    By Amy Rzepka Uncategorized
  • 17 Jan

    Why we sing the same exact songs every single week in our Parent & Tot class

    In our Parent & Tot learn-to-swim program for kids under the age of three, we follow almost the exact same routine in every class, every single week. This might seem super boring to an adult, but it’s a deliberate effort on our part to help our youngest swimmers quickly adapt and adjust to our program.

    Predictability and routine help young children establish trust and feel safe. The more quickly we can establish this with our littlest customers and get them to a place where they are ready to learn, the sooner parents will reap the return-on-investment from lessons.

    Parents can help ensure a successful transition into the program by reinforcing aspects of the lesson, such as practicing the group sing-a-long songs at home in the bathtub during the week! 

    To help you get started today, below are the three primary songs we sing in our Parent & Tot class!

    Tiny Tim the Turtle
    I had a little Turtle,
    His name was Tiny Tim.
    I put him in the bathtub,
    To see if he could swim.
    He drank up all the water
    And ate a bar of soap.
    And now he’s in his bed,
    With bubbles in his throat!
    (Everyone blows bubbles)
    ***Repeat***

    What to do if water… 
    What do you do if you get water in the mouth? (parent coughs)
    What do you do if you get water in the nose? (parent hums)
    What do you do if you get water in the eye (parent says blink blink blink)  
    What do you do if you get water in your ear? (parent shakes their head side to side)
    ***Repeat***

    Reach and Splash
    (With child sitting on parent’s lap facing outward,
    parent moves child’s arms in a freestyle stroke pattern
    singing the words below and ending with arms extended overhead.)
    Reach and splash, reach and splash, and make a little splash splash
    Reach and splash, reach and splash, and make a little splash splash
    ***Repeat***

    By Amy Rzepka Uncategorized